Manage HTP-1 Filters
The Monoprice HTP-1 is a 16 channel AV Processor. It has two particular features that make it relevant to BEQDesigner
- a 16 band parametric equaliser per channel
- a websocket based API that allows an application to configure that equaliser
The processor provides a web based UI for manual configuration of the parametric equaliser however this UI has some limitations
- there is no way to bulk load a set of filters in one go
- the UI lists filters per band rather than per channel
- there is no visualisation of the resulting filters
BEQDesigner has all of these features and the HTP-1 Filter Manager dialog enables a user to define filters in BEQDesigner and then sync them with the device.
Opening the Dialog
This is launched via Tools > Manage HTP-1 Filters or via keyboard shortcut CTRL+M.
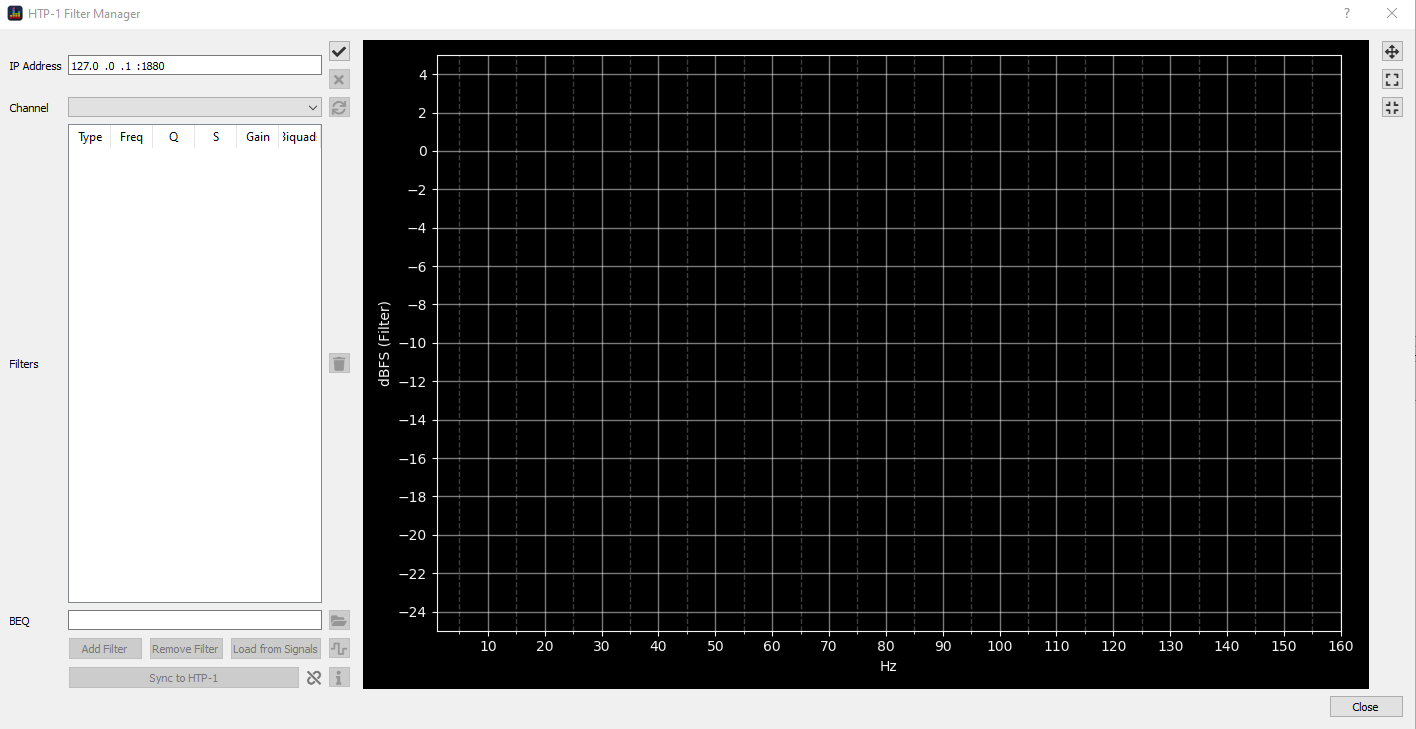
Connecting to the Device
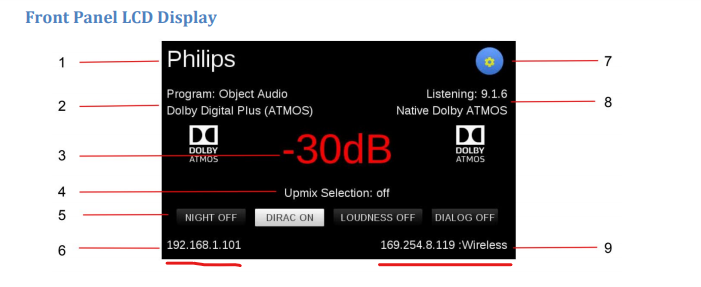
The IP address of the processor is visible on the front panel of the device in either the bottom left or bottom right corner (depending on how it is connected to the network)
- Enter this address into the IP Address field followed by
:80, for example if the IP address is192.168.1.123then enter192.168.1.123:80 - Click the
Connectbutton, this is labelled with a tick (a.k.a check)
Upon a successful connection, the current state of the device will be loaded. The dialog will now show:
- the active channel groups as configured via
System Configuration > Speakersin the HTP-1 UI - the PEQs specified in each band via
System Configuration > EQ
The dialog is now in single channel beq mode.
Basic Controls
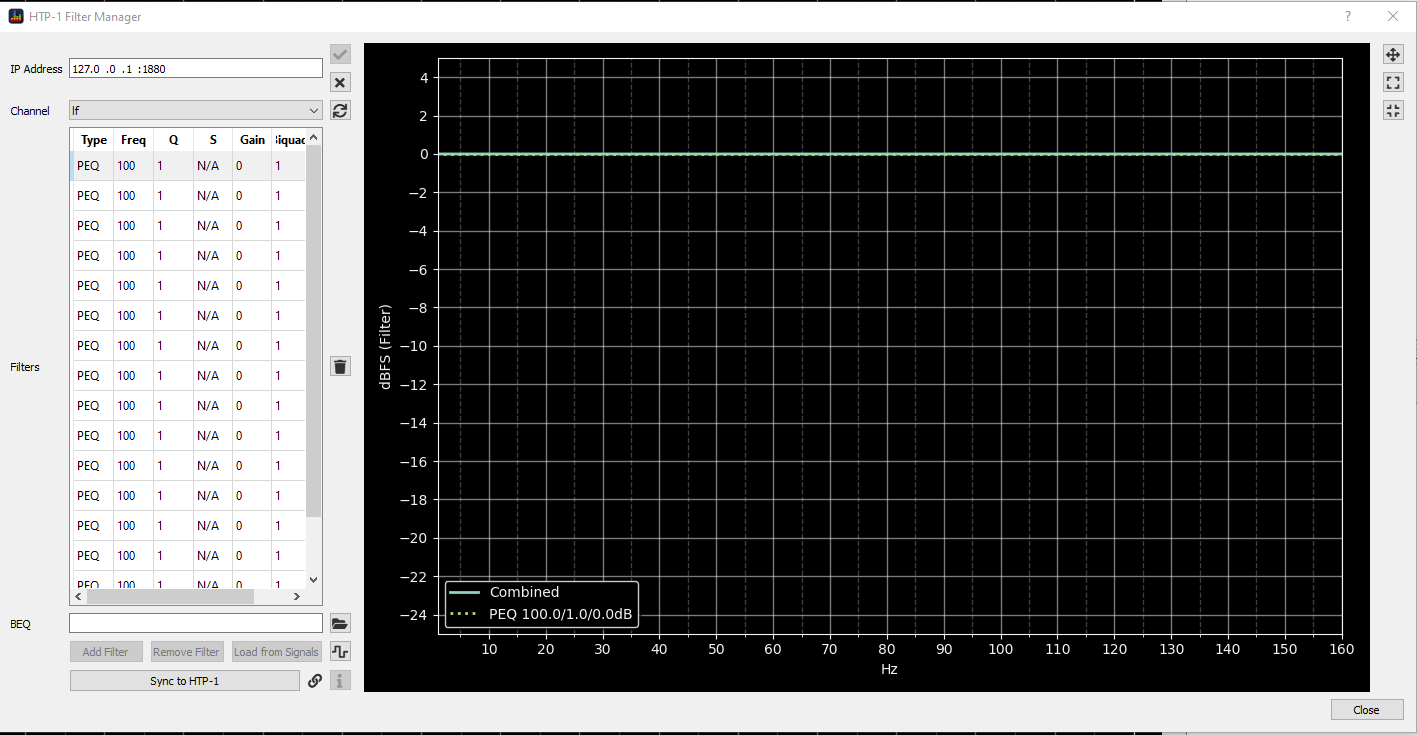
A number of fields and buttons are now enabled, from top to bottom:
- Disconnect: disconnects from the HTP-1
- Resync: reloads filters from the HTP-1, any local updates are discarded
- Channel: select the current channel to edit, the displayed filters will update on change
- Filters: shows the filters currently loaded into the 16 band PEQ for the selected channel
- Delete: any selected row is reset to a passthrough filter (i.e. gain = 0dB), multiple channels can be selected at once
- Sync to HTP-1: updates the current channel with the displayed filters
Updating Filters in the HTP-1
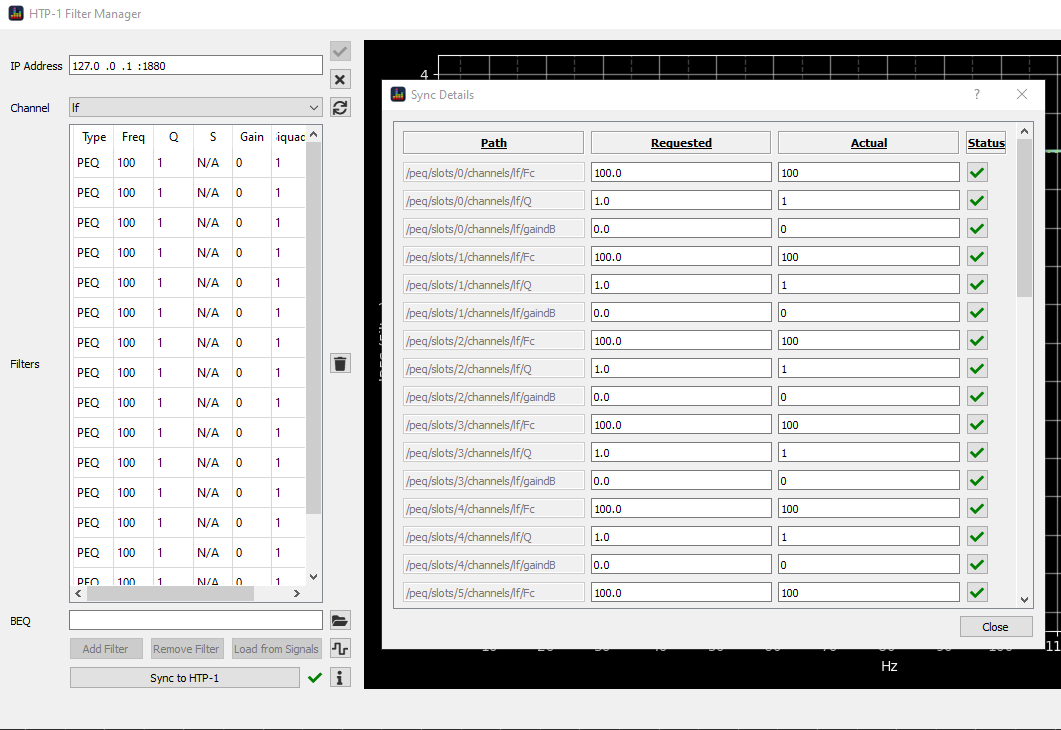
Pressing the Sync to HTP-1 button updates the device with the configured filters.
On a successful update, the icon next to the button will turn into a green tick. If the update was unsuccessful for any reason, the icon will turn into a red x.
Info
After any sync, the info button will be enabled which will show a dialog showing all individual updates. Refer to this in the event of problems.
Single Channel BEQ Mode
This mode allows an existing BEQ filter to be added to the currently selected channel.
This relies on the presence of the BEQ filters shared in minidsp xml format, download these using the Preferences dialog
Info
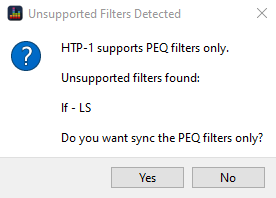
The HTP-1 has supported shelf filters since v1.4.1 of its firmware.
A warning will be displayed if you attempt to sync a shelf filter to a device running an earlier version.
Adding a BEQ
- Click the
Openbutton and select an xml file - Click
Add Filter, the filter will be added into the last n PEQ bands and the chart will show a preview of the total filter
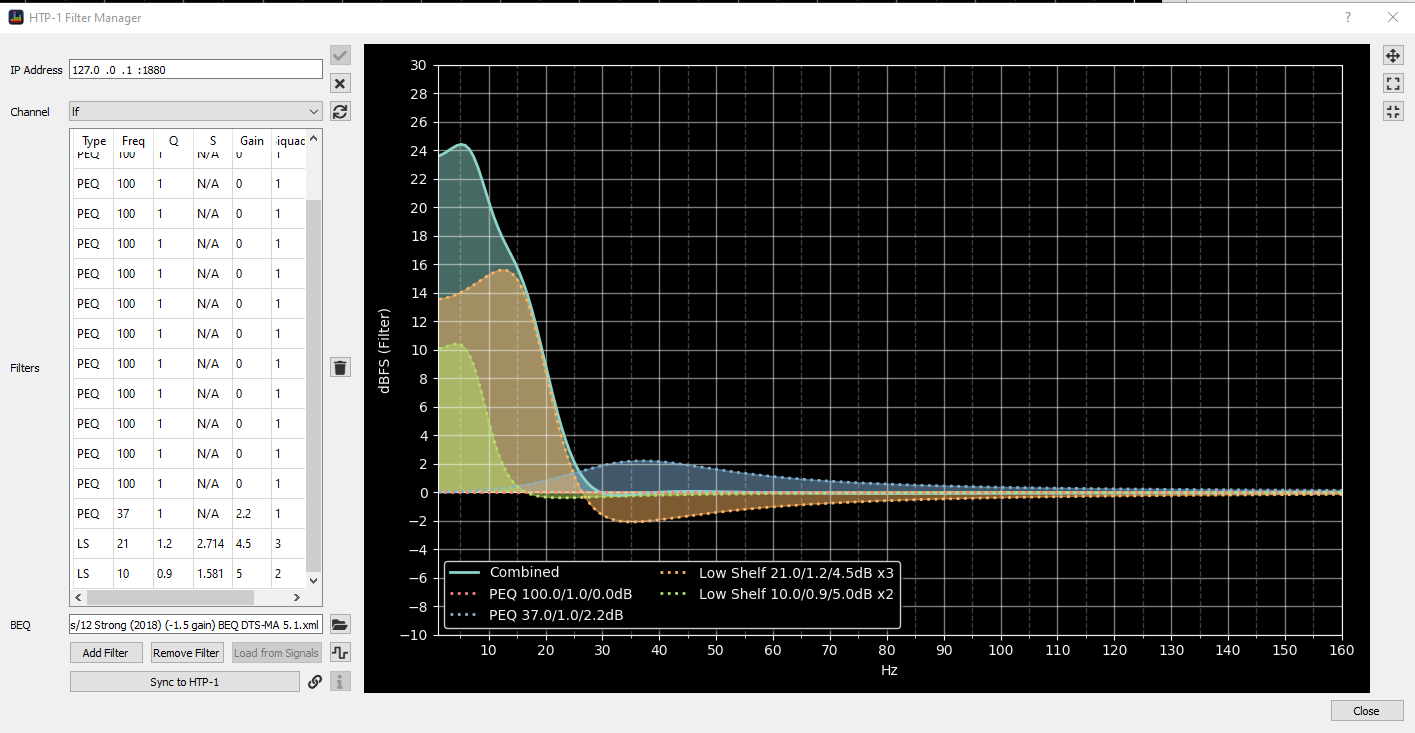
- Sync the filters to the device
Removing a BEQ
This assumes you have added the BEQ using this dialog, i.e. that the specified filters are in the last n PEQ bands.
- Click the
Openbutton and select an xml file - Click
Remove Filter, the matching filters will be highlighted

- Click
Deleteto replace them with a passthrough - Sync the filters to the device
Signal Mode
Click the highlighted button to switch into signal mode.
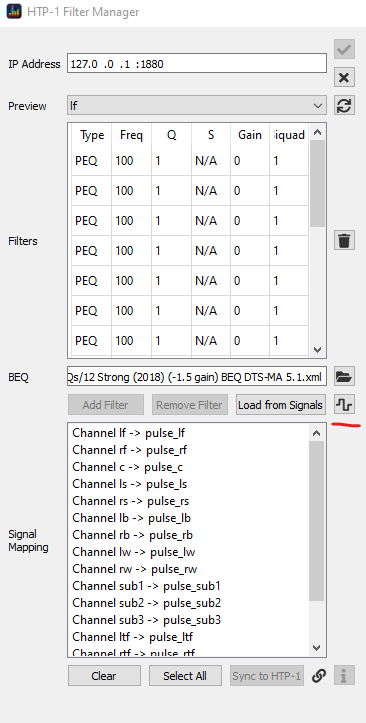
This does the following:
- creates a signal in BEQDesigner for each active channel named
pulse_<channel name>(e.g.pulse_lfis the left front channel) - for each channel, loads the 16 band PEQ into the filter for that channel
- maps each signal to the corresponding channel and displays this mapping in the
Signal Mappingfield - Changes the channel dropdown to a preview, it now previews the filter for the currently selected channel
You can now close the dialog and continue editing in BEQDesigner as normal, this enables access to features like
Updating Filters in Signal Mode
Filter operations (add/remove BEQ, sync to HTP-1) in signal mode operate on all selected channels in the Signal Mapping box.
This allows you to update all channels with one click or add a BEQ filter to multiple subwoofer channels at once.
Designing your own BEQ
An alternative to downloading all channels from the device is as follows
- Follow the usual beq workflow
- Connect to the HTP-1
- Double click a sub channel in the signal mapping dialog
- Select all sub channels and the named signal, click
Save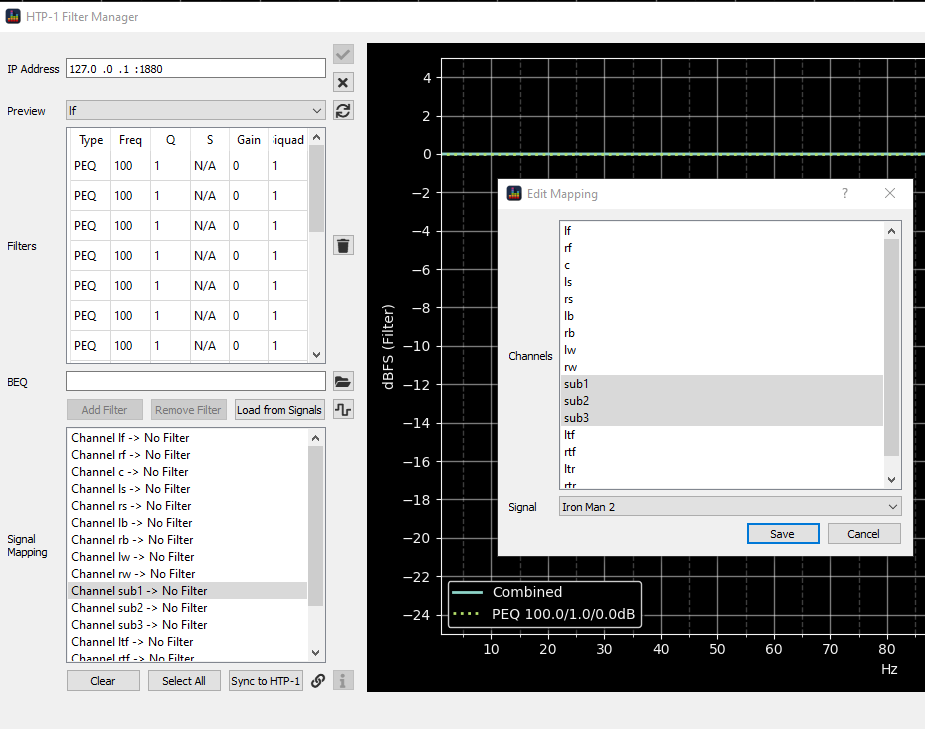
- Preview the channel to verify
- Sync the filters to the device